TIPS Raspberry Pi Network Issues

wardmundy

Nerd Uno
Joined
Oct 12, 2007
Messages
19,159
Reaction score
5,192
UPDATED: 03/01/16

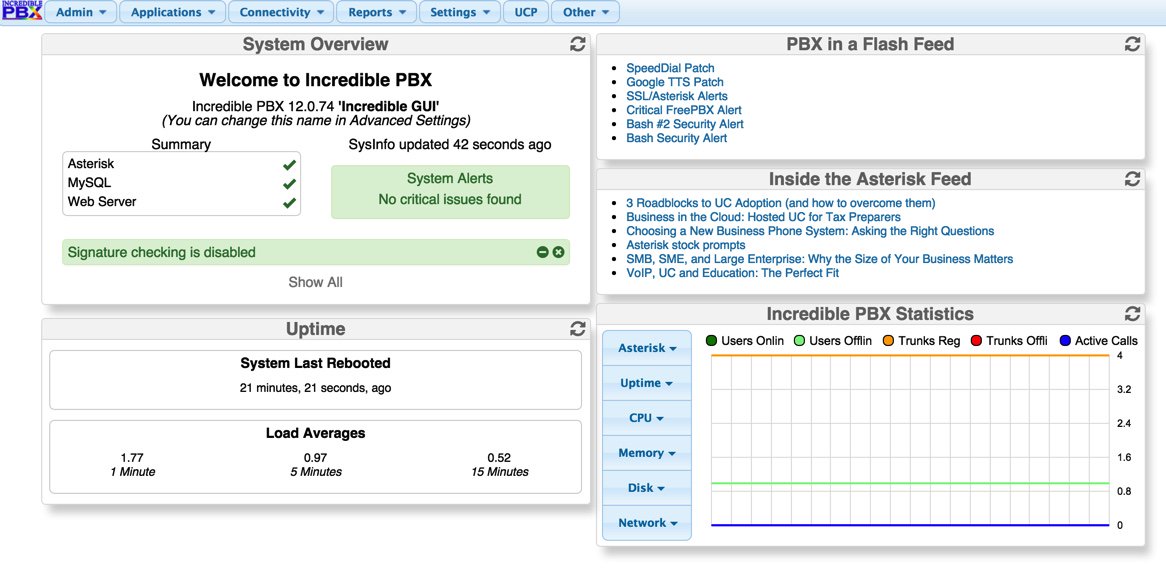
For those that have been eagerly awaiting a Raspbian 8 build of Incredible PBX with Asterisk 13 for the Raspberry Pi 2 & 3 (only!), we're ready for a few pioneers. If you find a bug, please document it here.
CcZrAdoW8AAnLCU.jpg


We wrestled with whether to release a traditional installer where you would create the base Raspbian image and then run an install script. However, the build time was nearly 3 hours after you had created the base Raspbian platform. There also were some gnarly issues with Raspbian 8 that required major changes to the previous Raspbian Wheezy installer, and we haven't had time to script all of the required changes. So we've returned to our previous methodology.

Just download and unzip the Incredible PBX image (1.5GB) of your choice from SourceForge and burn it to a microSDHC card (8GB or larger and preferably Type 10). Then boot.

2 IMAGES AVAILABLE: With and without GV OAUTH Support. Both include Incredible Fax installer.

To burn the image to an SD card with Linux, use fdisk -l to identify the correct device, e.g. /dev/sdb. DON'T ERASE YOUR HARD DISK BY MISTAKE!! Then: dd if=incrediblepbx13-raspbian8.img of=/dev/sdb. Then: sync.

Complete tutorials to create SD cards for Linux, Mac, and Windows available here.

CcUKEg0XIAAKG_6.jpg


Startup instructions:

1. Boot new SDcard image from Raspberry Pi 2 or 3.
2. From display/keyboard connected to Raspberry Pi, login as pi with password: raspberry.
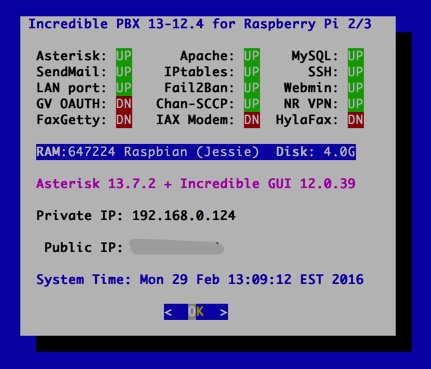
3. Go through the automatic setup procedure and resize your SD card when prompted to do so.
4. Write down the IP address of your RasPi. Reboot.
5. Following reboot, log in using SSH/Putty from a remote PC. Username: root Password: password
6. Complete setup steps by resetting all of your passwords at the prompts.

Nerd Vittles tutorial: http://nerdvittles.com/?p=17094
Google Voice OAUTH tutorial: http://nerdvittles.com/?p=14787 (Steps 8-10)

Known bugs:

None reported.

 
Last edited:

jerrm

Guru
Joined
Sep 23, 2015
Messages
838
Reaction score
405
Downloading now. May not get to it otherwise today, but will let you know. I was planning to come back to my Raspberry/PJSIP problems this week, so will be curious how this fares.

I would eventually like to see the install script, or at least instructions. My preference for IPBX over RasPBX is knowing how the sausage is made more so than the additional features.
 

wardmundy

Nerd Uno
Joined
Oct 12, 2007
Messages
19,159
Reaction score
5,192
@jerrm: There will be a Nerd Vittles tutorial early next week soon. Install script is probably a ways off. Fixing quirks on one image is fairly easy. Making it generic is considerably more difficult, but we'll get there eventually.
 
Last edited:

wardmundy

Nerd Uno
Joined
Oct 12, 2007
Messages
19,159
Reaction score
5,192
Fax install is not yet working because of incompatibilities with Jessie so don't try it.

Wireless networking works if you add your credentials to /etc/wpa_supplicant/wpa_supplicant.conf:
Code:
network={
ssid="YourSSID"
psk="YourSSIDpassword"
key_mgmt=WPA-PSK
scan_ssid=1
}

Then restart wlan0:
Code:
ifdown wlan0
ifup wlan0
 
Last edited:

jerrm

Guru
Joined
Sep 23, 2015
Messages
838
Reaction score
405
@jerrm: There will be a Nerd Vittles tutorial early next week. Install script is probably a ways off. Fixing quirks on one image is fairly easy. Making it generic is considerably more difficult, but we'll get there eventually.
No worries. Understand the effort needed for the script. Always appreciate the effort. This is a great step forward.
 

RPi-Fan

Member
Joined
Jun 8, 2014
Messages
85
Reaction score
13
Just download and unzip the Incredible PBX image (1.45GB), burn it to a microSDHC card (8GB or larger and preferably Type 10). Then boot. Everything gets configured in a couple minutes. Default Username: root Default Password: password.

ZIP file checksum matches what is posted.

Image burned to 16 GB card, read back, and compared / verified.

PuTTy connects but immediately reports:

Network error: Software caused connection abort

Did you remember to enable root logins in /etc/ssh/sshd_config?:

PermitRootLogin without-password -> PermitRootLogin yes

Web interface comes up, but login password unknown.
 

Martin Lunt

New Member
Joined
Feb 28, 2016
Messages
5
Reaction score
4
pjsip doesn't load automatically. Trying to load it from the CLI gives:
[2016-02-29 09:40:59] WARNING[4989]: loader.c:553 load_dynamic_module: Error loading module 'pjsip': /usr/lib/asterisk/modules/pjsip.so: cannot open shared object file: No such file or directory
[2016-02-29 09:40:59] WARNING[4989]: loader.c:1079 load_resource: Module 'pjsip' could not be loaded.
 

wardmundy

Nerd Uno
Joined
Oct 12, 2007
Messages
19,159
Reaction score
5,192
@RPi-Fan: Sorry about that. There was a problem with the SSH setup. Reworking it now. See first post for new download availability.

@Martin Lunt: Will wrestle with this later today. Not addressed in 02/29 image which is uploading now. Thanks.
 
Last edited:

RPi-Fan

Member
Joined
Jun 8, 2014
Messages
85
Reaction score
13
@RPi-Fan: Sorry about that. There was a problem with the SSH setup. Reworking it now. See first post for new download availability.
.
I downloaded the new version, but don't see any difference (PuTTY immediately aborts on an SSH connection).
 

wardmundy

Nerd Uno
Joined
Oct 12, 2007
Messages
19,159
Reaction score
5,192
I downloaded the new version, but don't see any difference (PuTTY immediately aborts on an SSH connection).
Did you follow the Startup Instructions in the tutorial at the top of the thread?? You can't originally boot and login from Putty. You first must login from the console as pi with password: raspberry.
 

wardmundy

Nerd Uno
Joined
Oct 12, 2007
Messages
19,159
Reaction score
5,192
@Martin Lunt: Try this for PJsip.

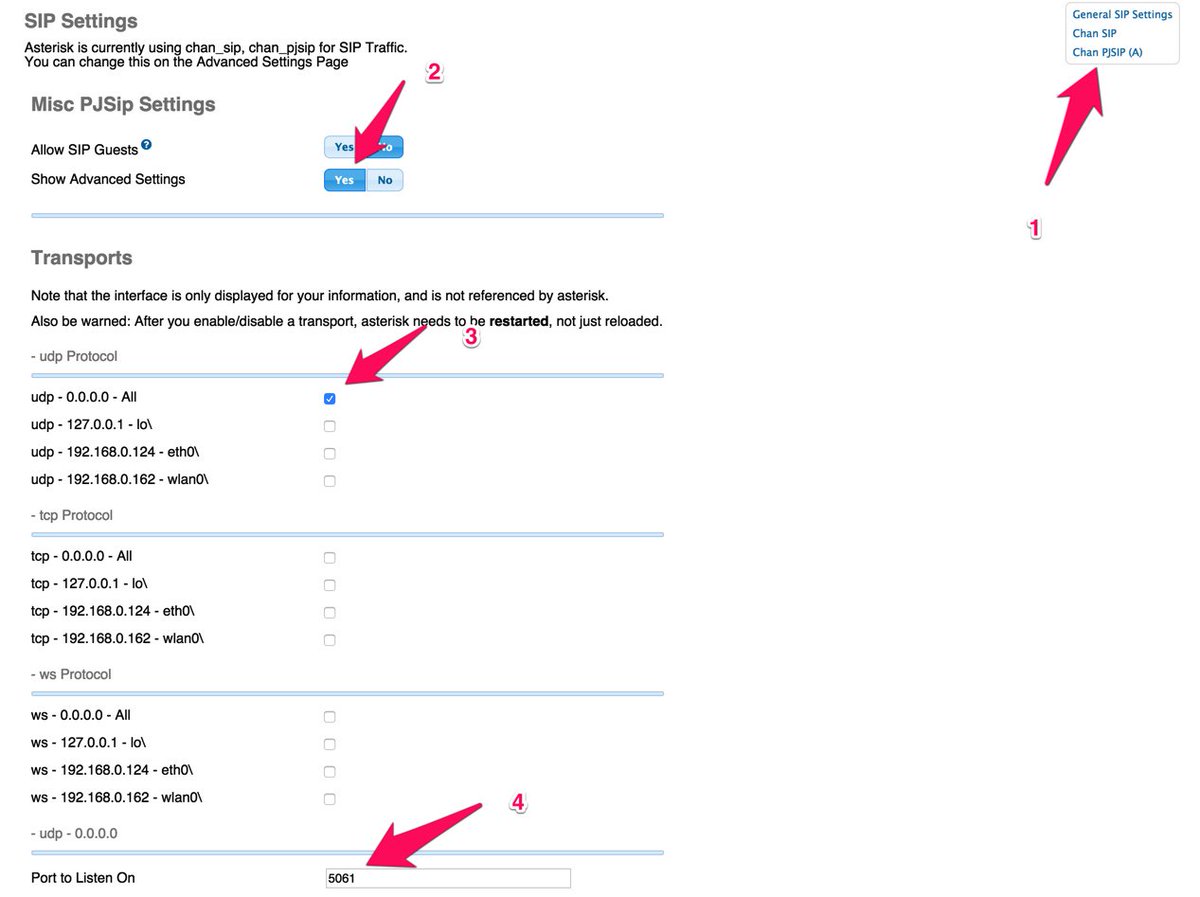
In Settings -> Advanced Settings, change the SIP Channel Driver entry to BOTH. Then in Settings -> Asterisk SIP Settings, go through the following steps in order. You'll have to click Submit after each of Steps #2, 3 and 4. Then finally click the red Apply Settings button. Restart Asterisk when you're finished: amportal restart. You then should be able to add a PJsip extension and connect to it on port 5061.

CcatryiWwAE984Q.jpg


UPDATE: We've now tested and confirmed that this solves the missing PJsip issue. This fix will be included in the March 1 image update. See first post for availability.
 
Last edited:

jerrm

Guru
Joined
Sep 23, 2015
Messages
838
Reaction score
405
UPDATE: We've now tested and confirmed that this solves the missing PJsip issue. This fix will be included in the March 1 image update. See first post for availability.

Were there any difference in the asterisk/pjproject builds from the Wheezy install script?

As noted here, I had issues with PJSIP under the Wheezy version(enabled with the same steps at your post, three Pis, at least 6 build attempts, several SD cards, etc). The Jessie build seems OK so far(knock on wood).
 

jerrm

Guru
Joined
Sep 23, 2015
Messages
838
Reaction score
405
The UI in the Jessie version is markedly more responsive than Wheezy. I assume due to the updated Apache and PHP. I had noticed the difference before between Wheezy IPBX and Jessie RasPBX. Very glad to see the same improvement for IPBX now.
 

wardmundy

Nerd Uno
Joined
Oct 12, 2007
Messages
19,159
Reaction score
5,192
Were there any difference in the asterisk/pjproject builds from the Wheezy install script?

That section of the code is pretty much the same except added ldconfig after the pjproject build.
 

jerrm

Guru
Joined
Sep 23, 2015
Messages
838
Reaction score
405
I have to agree with the sentiment that ssh should be enabled by default. I acknowledge the security concerns, but the fact is many Linux builds have ssh enabled by default. The odds of a Pi being brought into the world on an open internet connection are pretty much nil, and the convenience of being headless is HUUUUUUUUGE.
 

jerrm

Guru
Joined
Sep 23, 2015
Messages
838
Reaction score
405
Also...

The initial install script should prompt to change the "pi" user's password. As a sudoer with full rights, "pi" is effectively root with a very public default password.
 

Members online

No members online now.

Forum statistics

Threads
25,770
Messages
167,441
Members
19,181
Latest member
ejrubin
Get 3CX - Absolutely Free!

Link up your team and customers Phone System Live Chat Video Conferencing

Hosted or Self-managed. Up to 10 users free forever. No credit card. Try risk free.

3CX
A 3CX Account with that email already exists. You will be redirected to the Customer Portal to sign in or reset your password if you've forgotten it.
Top