AsteriDex for XiVO (using native XiVO Phonebook)
@Sylvain Boily was kind enough to rework our AsteriDex code so that it could be used for Click-to-Dial with the native XiVO Phonebook that you'll find in the GUI at
IPX Services -> Phonebook. This version of AsteriDex cannot (yet) be used with the 411 Voice Dialer. You cannot use BOTH this version and the SQLite3 version on the same server!
Installation
1. Log into XiVO as root and issue the following commands:
Code:
wget https://github.com/sboily/asteridex4/archive/0.1.5.tar.gz
mkdir -p /usr/share/xivo-web-interface/www/asteridex4/templates_c
tar xfvz 0.1.5.tar.gz --strip-components=1 -C /usr/share/xivo-web-interface/www/asteridex4/
chown www-data /usr/share/xivo-web-interface/www/asteridex4/templates_c
apt-get install smarty3
cd /usr/share/xivo-web-interface/www/asteridex4/config
nano -w config.inc.php
2. Once the editor opens, stop there for the moment and log into the XiVO web interface with your browser.
3. Go to a user account you've already created under
IPBX Settings -> Users. Check
Enable XiVO Client and add a
Username and
Password for the user to give access to AsteriDex. The
Profile type doesn't matter for the moment so just choose Supervisor.
SAVE your changes.
4. Now add a webservice account with the ACLs shown below. Goto
Configuration -> Web Services Access and click
+. In the
General tab, give the account a
name (asteridex), a
login name (asteridex), and a secure
password (make1up). Click on the
ACL tab and click
+ twice to add each of the following. Then click
SAVE.
NOTE: You'll need this login name and password in the next step!
5. Now switch back to your editor in the CLI. Replace the xivo_host entry with the IP address of your server. Then insert your user and pwd entries that you created in step #4. Save your changes: Ctrl-X, Y, then ENTER.
NOTE: Latest release also
available on GitHub.
Operation
1. Create entries in your Phonebook using the XiVO web interface:
IPX Services -> Phonebook. Multiple phone numbers per account are supported!
2. Access AsteriDex at:
https://xivo-ipaddress/asteridex4/ (trailing slash is required!)
3. Login using the username and password you created in Configuration step #3 above.
4. Click on any entry to dial the number.
5. Your extension associated with your User account (the one that you used to log in) will now ring.
6. Answer the call on your local extension and the call to the AsteriDex number will be placed using the outbound route matching the dial string of the number in your Phonebook. If you enter a cellphone number, an office phone number, and a home phone number for someone in your Phonebook, these will display in AsteriDex in the same order. No indication at the moment as to type of phone, but we'll add it to the
@Sylvain Boily wish list.
Additional documentation available here:
http://documentation.xivo.io/en/stable/cti_client/cti_client.html
http://documentation.xivo.io/en/stable/cti_client/xlets/people.html
http://documentation.xivo.io/en/stable/administration/phonebook.html
http://documentation.xivo.io/en/stable/system/service_authentication/service_authentication.html
http://documentation.xivo.io/en/stable/system/xivo-auth/xivo-auth.html
") What the target for this addons ? The end user with only his contacts or to share contacts with everybody ?
What the target for this addons ? The end user with only his contacts or to share contacts with everybody ?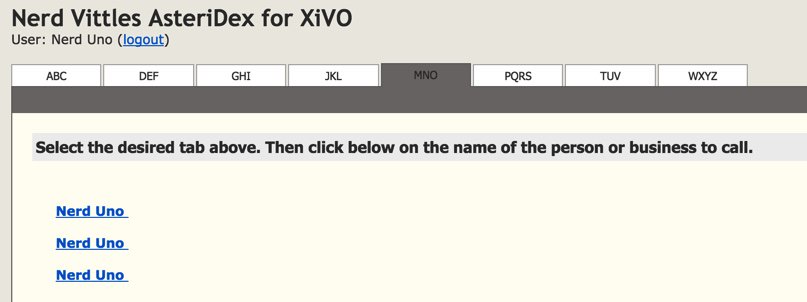

 Phone System