wardmundy
Nerd Uno
- Joined
- Oct 12, 2007
- Messages
- 19,201
- Reaction score
- 5,219
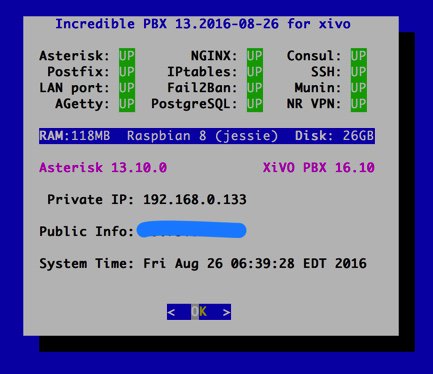
We've put up the final release image of Incredible PBX for XiVO. It works only on the Raspberry Pi 3. Don't even attempt it on a RasPi 2. XiVO requires a lot of resources, and the RasPi 2 simply does not have the necessary horsepower. The 1.3GB image and a Mac script to create a microSD card from the image are both available on SourceForge. Be sure to use at least an 8GB microSD card, preferably 16GB or larger. Don't even waste your time without a Class 10 card!
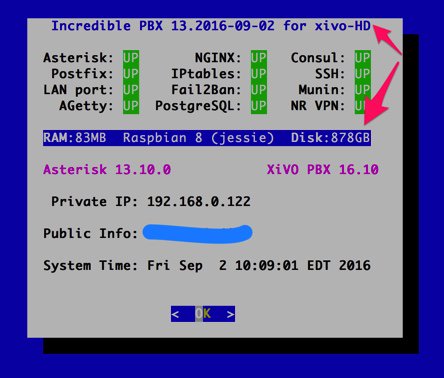
Special thanks to Iris-Network for the original Raspivo - XiVO build. XiVO 16.10 with Asterisk 13.10.0 now available Newer build with WiFi and Bluetooth support available after 4:30 p.m. EDT, Sunday, 08/28/2016.
1. Download and unzip image to your desktop
2. Burn image to microSD card
3. Boot RasPi 3 from microSD card
4. Log in as root with password of password
5. Initial config will place you in raspi-config to resize the image to your SD card's dimensions
6. After reboot, login from desktop PC using SSH or Putty at the IP address shown in step #5 to set up passwords
7. After install completes, add trunks and inbound and outbound routes as desired (see below).
NOTE: Google Voice scripts to add-gvtrunk and del-gvtrunk are preconfigured and ready to run in /root.
To get started with other trunks, point a web browser to the IP address of your PBX. Login as root with the XiVO GUI password you set up above. If you ever forget your password, you can run /root/admin-pw-change to reconfigure it.
XIVO Trunk Implementation Tutorials
XIVO Call Routing Tutorials
Basically, this install is the same setup as the one for VirtualBox in this week's Nerd Vittles article.
The original Incredible PBX for XiVO tutorial is here.
Feedback appreciated!
Special thanks to Iris-Network for the original Raspivo - XiVO build. XiVO 16.10 with Asterisk 13.10.0 now available Newer build with WiFi and Bluetooth support available after 4:30 p.m. EDT, Sunday, 08/28/2016.
1. Download and unzip image to your desktop
2. Burn image to microSD card
3. Boot RasPi 3 from microSD card
4. Log in as root with password of password
5. Initial config will place you in raspi-config to resize the image to your SD card's dimensions
6. After reboot, login from desktop PC using SSH or Putty at the IP address shown in step #5 to set up passwords
7. After install completes, add trunks and inbound and outbound routes as desired (see below).
NOTE: Google Voice scripts to add-gvtrunk and del-gvtrunk are preconfigured and ready to run in /root.
To get started with other trunks, point a web browser to the IP address of your PBX. Login as root with the XiVO GUI password you set up above. If you ever forget your password, you can run /root/admin-pw-change to reconfigure it.
XIVO Trunk Implementation Tutorials
- XiVO Trunks Tutorial: Installing a Vitelity SIP Trunk2
- XiVO Trunks Tutorial: Installing a VoIP.ms SIP Trunk
- XiVO Trunks Tutorial: Installing a RingPlus SIP Trunk
- XiVO Trunks Tutorial: Installing a FreeVoipDeal (Betamax) SIP Trunk
- XiVO Trunks Tutorial: Installing a Google Voice-Simonics SIP Trunk
- XiVO Trunks Tutorial: Deploying Native Google Voice with OAuth Trunks
- XiVO Trunks Tutorial: Installing an Anveo Direct Outbound SIP Trunk
- XiVO Trunks Tutorial: Installing a Skype Connect SIP Trunk
XIVO Call Routing Tutorials
- XiVO Call Routing Tutorial: Creating Outbound Routes for PSTN Calling
- XiVO Call Routing Tutorial: Creating Inbound Routes for DIDs
Basically, this install is the same setup as the one for VirtualBox in this week's Nerd Vittles article.
The original Incredible PBX for XiVO tutorial is here.
Feedback appreciated!
Last edited:

 Phone System